Preface
In previous posts in this series I’ve used categories rather than tags. I have now switched these around because naming matters. If you need to do this, a quick sed execution will do the trick:
sed -i 's/categories:/tags:/g' *.md
Having changed the variable of tags we also need to change the include for displaying tags to replace categories with tags.
Autopages
The jekyll-paginate-v2 gem has built-in support for generating pages based on the tags and categories in posts. First, we need enable Autopages through our site configuration:
autopages:
  enabled: true

  categories:
    enabled: true
    layouts:
       - 'home.html'
    title: 'Posts in category :cat'
    permalink: '/category/:cat'

  collections:
    enabled: false

  tags:
    enabled: true
    layouts:
       - 'home.html'
    title: 'Posts tagged with :tag'
    permalink: '/tag/:tag'
I don’t use collections on this blog right now so I’ve left that as disabled. I’ve updated the home.html file from the Minima theme to display excerpts when Jekyll recognises a page as auto-generated and to add the title specified in the configuration file. This means that there is a single page to maintain for the front page as well as the generated content:
<h1 class="page-heading">
{% if page.title and page.title != site.title %}
{{ page.title | escape }}
{% else %}
Posts
{% endif %}
</h1>
{{ content }}
<ul class="post-list">
{% for post in paginator.posts %}
<li>
<span class="post-meta">{{ post.date | date: "%b %-d, %Y" }}</span>
<h2>
<a class="post-link" href="{{ post.url | relative_url }}">{{ post.title | escape }}</a>
</h2>
{% if page.autopages %}
<p>{{ post.excerpt }}</p>
<p><a href="{{ post.url }}">READ MORE >></a></p>
{% else %}
<p>{{ post.content }}</p>
{% include page_tags.html tags=post.tags %}
{% endif %}
</li>
{% endfor %}
</ul>
We can then add a link to the tag page in the permalink format we specified in the config file which will take us to a page with the tag title and excerpts (with paging) from all the blog posts with the specified tag.
<li><a href="/tag/{{tag}}">{{ tag }}</a></li>
Note: The tags on this blog are very simplistic. If you have some special characters in your tags the link will require some more filtering as the paginate gem performs transformations on the tag name in the URL.
Improving performance for local build
Enabling autopages can have a significant impact on the site build time since it needs to generate a large amount of pages. I’ve added a separate configuration file that disables expensive features so that I can get faster feedback on changes made, _config_dev.yml:
###################################################
## Disable features to speed up the build locally #
###################################################

# Disable autopages
autopages:
  enabled: false

  categories:
    enabled: false

  collections:
    enabled: false

  tags:
    enabled: false

# Disable noscript feature for gists as this makes an API call to Github for every gist
gist:
    noscript: false

# Disable LSI because this can be dog slow
lsi: false

#########################
## Development features #
#########################

# Enable showing drafts
show_drafts: true

# Enable showing future posts
future: true

# Enable incremental builds
incremental: true
With this config in hand we need to direct jekyll to the configuration files to use. In this example, any values specified in _config_dev.yml will override the values in _config.yml.
jekyll serve --config _config.yml,_config_dev.yml
See the configuration documentation for a list of options available.
A site map
Let’s start building a site map to add some extra options for navigation. Yes, I’m old school like that.
Create a page in the root of the source content ( map.md in my case) so that Jekyll can process it. With the Minima theme this will automatically show up in the main menu.
To start off we’ll generate a list of tags and size the elements according to their usage frequency using inline styles. Following the advice on this post and borrowing some code from it,
---
layout: page
title: Map
permalink: /map/
---

## All tags

{% assign tags = site.tags | sort %}
<div class="post-tags">
  <ul>
    {% for tag in tags %}
      <li>
      <a href="/tag/{{ tag | first | slugify }}/" style="font-size: {{ tag | last | size  |  times: 6 | plus: 80  }}%">
          {{ tag[0] | replace:'-', ' ' }} ({{ tag | last | size }})
        </a>
      </li>
    {% endfor %}
  </ul>
</div>
To avoid overflows of the tag text to the next line and cropped borders, we add some margins to the top and bottom, set white-space to nowrap and set the list item style to inline-block.
.post-tags {
  ul {
    list-style: none;

    li {
      display: inline-block;
      margin-top: 10px;
      margin-bottom: 10px;

      a {
        padding: 5px 10px 5px 10px;
        border-radius: 20px;
        background: #EEEEFF;
        white-space: nowrap;
      }
    }
  }
}
The results are looking promising, albeit a bit unpolished:
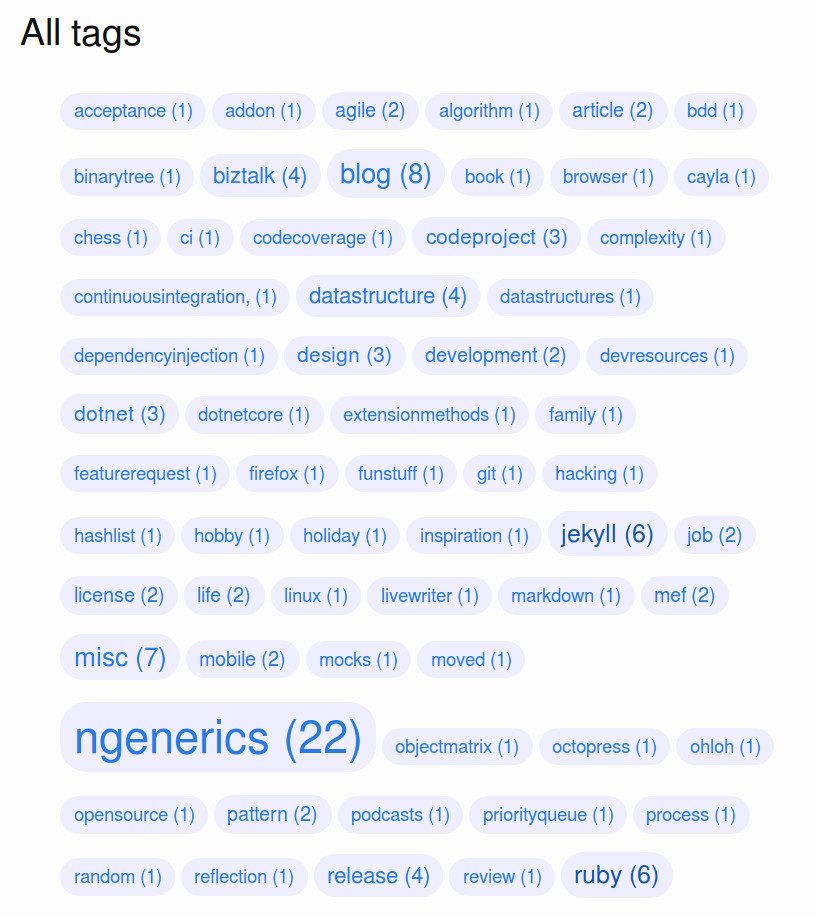
I have some cleaning up to do.
Most recent
We can display an index to the most recent posts. We’ll do this by starting off with a generic component to display a list of posts given to it.
{% if include.items %}
  <div class="post-mini-list">

    {% if include.heading %}
    <h3>{{ include.heading }}</h3>
    {% endif %}

    <ul>
      {% for post in include.items limit: 5 %}
      <li>
        <a href="{{ post.url }}">{{ post.date | date: site.dateformat }} - {{ post.title }}</a>
      </li>
      {% endfor %}
    </ul>
  </div>
{% endif %}
This partial expects page to provide two variables - include.items which contain some posts, and include.heading which could contain an optional heading. Note the limit on 5 posts when iterating over the posts so that we don’t end up with a massive list of posts. Also note the variable usage of site.dateformat, which I’ve set in the _config.yml file. You can find a good reference to specifying date formats to use in Liquid tags here.
We can include this into the about page:
{% include post-list.html items = site.posts heading = "Latest" %}
R.I.P. Jekyll
This would have been part of this article if I did not rage quit:
- List of series
- Most popular
- Most recent
- By date buckets
It’s hard to build advanced features in Jekyll. The API exposed by the framework impose limitations to the point where any sufficiently advanced plugin becomes a mess of spaghetti code in time. Back in the day when static site generators were a novelty, Jekyll was the solution. Times have moved on and there are hoards of great alternatives available.
I’ve moved this blog over to Gatsby.js. Gatsby is super fast, fully customisable and spits out a Progressive Web App built on top of React. The migration process was pretty seamless other than having to fix some posts’ frontmatter. Customisation takes a little while longer as you find your way around the starter pack. On that note, I tried hard not to break any permalinks but one or two mistakes might have slipped through. I’ll leave advanced Gatsby.js topics for another post and move on.
Photo by Jeremy Bishop on Unsplash